shopping24 documentation
s is for shopping
Integrate your s24widget
This page describes how to integration the shopping24 widget into your website.
Requirements
None! (The widget used to be a jQuery plugin)
Web Performance
We care about your page’s web performance! The JavaScript file is small, minified and you can load it asynchronously (non-blocking).
Integration
The integration consists of a container and a script. Something like this:
<div class="s24widget" data-app-id="abcd1234" data-widget-id="987" data-search-term="Blue Jeans"></div>
<script src="https://widget.s24.com/js/s24widget.min.js" async></script>
Widget Container
First you need a container in your template in which the widget will be injected.
It should have the class s24widget and two attributes data-app-id and data-widget-id.
<div class="s24widget" data-app-id="APP_ID" data-widget-id="WIDGET_ID"></div>SEARCH-Widget
If you use our SEARCH-Widget, you can set you search term in a data-search-term attribute, like so:
<div class="s24widget" [...] data-search-term="MY SEARCH TERM"></div>SEMANTIC-Widget
Your site has to be crawled priorly for the semantic widget to be able to identify the correct content. Please contact cooperations@s24.com if your infrastructure denies such access, so we can provide you with the required IP addresses.
User ID
If you track a user ID, you can pass it to your widget container via a data-puid attribute.
This could look like this:
<div class="s24widget" data-app-id="APP_ID" data-widget-id="WIDGET_ID" data-puid="USER_ID"></div>CAUTION: For legal reasons, we cannot accept clear user ids. Please hash them!
AdBlocker Safety
We also offer you the option to integrate our widget AdBlocker safe. If you’re interested, please email us.
Custom A/B-Test
We also provide you with the possibility to track conversion of different variants. This could be interesting for you if you’d like to override the widget’s css or want to test different positions for the widget.
To identify your variants, please add the data-campaign attribute to your widget container.
This could look like this:
<div class="s24widget" data-app-id="APP_ID" data-widget-id="WIDGET_ID" data-campaign="VARIANT-A"></div>Google Ad Manager Integration
The s24 Widget easily integrates with Google Ad Manager services. Required code snippets are provided in your recomAD Widget dashboard. Conveniently use the html/js snippet as a creative integration in your preferred advertiser network. You can either use an existing delivery order or create a new one. A creative will be added to a line item.
Impressions and clicks will then be tracked automatically by Google Ad Manager. Viewable impressions must be configured manually, though.
Viewable impressions have to be created via a new line item in the delivery section of Google Ad Manager. Below you can find an example of a working viewable impressions configuration.
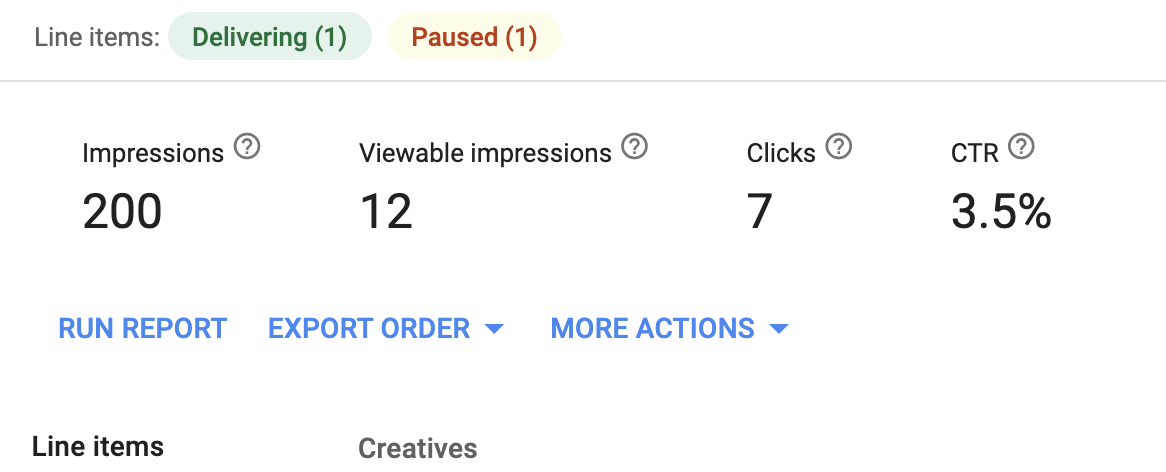
Upon activation and delivery your dashboard overview should reflect total impressions measured against viewable impressions:
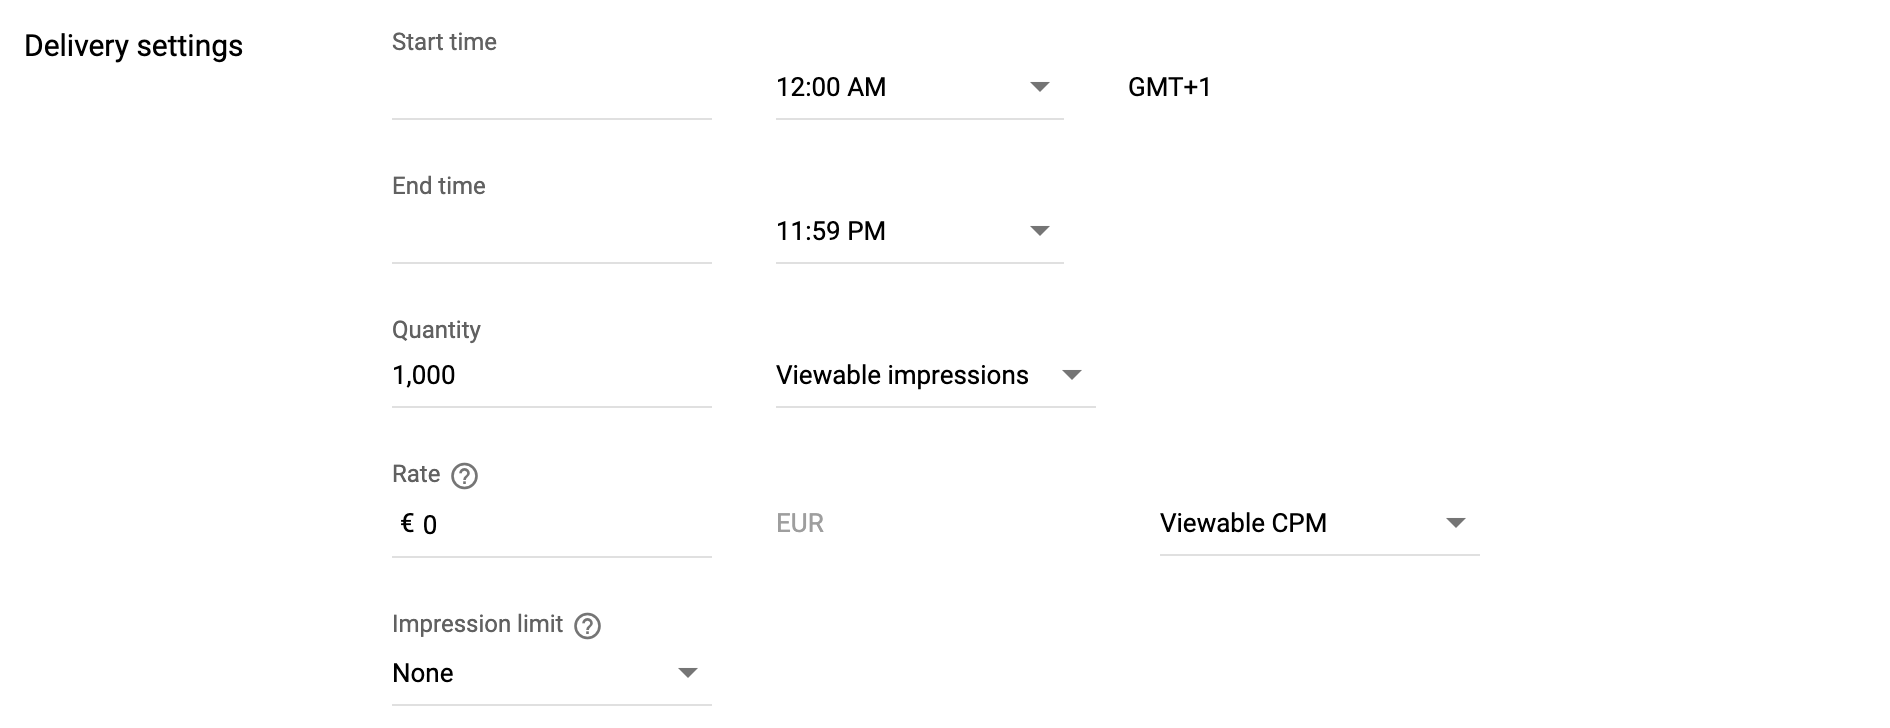
To create a new line item with a viewable impression setting select ‘Ad Type -> Display’. Choose ‘Viewable Impressions’ and the desired quantity to measure your viewable impressions against a target. Otherwise no viewable impressions will be visible.